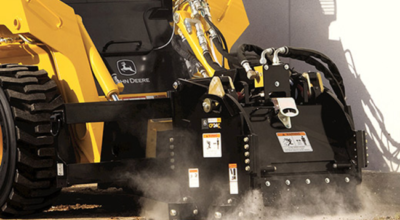
Depending on the bit, hydraulic hammers can be used to take on concrete flatwork projects, break rocks, or to prepare dirt for the application of concrete.
John Deere offers customers an assortment of hydraulic hammer options, including the HH20C, HH40C, HH60C, and HH80C. Additional couplers are also available so the hammers can be connected to backhoes or compact excavators.

Now that we understand a bit more about hydraulic hammers, let’s take a look at how to properly install, operate, and maintain them.
Hydraulic Hammer Installation
In this example, let’s assume the operating is using a skid steer. Maneuver the machine so the Quik-Tatch lines up with the mounting plate on the attachment. Tilt the attachment back, and latch the Quik-Tatch. Then, press the hammer on the ground to make sure all the latches are locked in place.
After the hammer is locked in place, connect the hydraulic hoses. Before connecting any coupler to a machine, you should first clean both ends of the connectors. When connecting the hoses, be sure to connect the return line first.
Hydraulic Hammer Operating Tips
Now, it’s time to operate the equipment. Here are some tips to keep in mind:
- Always operate the hydraulic hammer at a 90-degree angle against the material that’s being worked on.
- When the front wheels of the machine start to lift off the ground during operation, the correct amount of downforce has been applied.
- Do not operate John Deere hydraulic hammers for more than 15 seconds in one single spot. If the material does not break, reposition the tool and try again.
- Never operate the hammer with the bit removed.
Hydraulic Hammer Maintenance
To ensure the hydraulic hammer stays running for years to come, proper maintenance is required.
- Complete all daily maintenance checks.
- The hammer bushings should be well-lubricated at all times. Lubricate the bit shank and bushings every two hours. When doing this, raise the attachment up off the ground, angle the hammer to 90 degrees, and lower the attachment until the bit comes in contact with the ground.
- On a weekly basis or every 50 hours, be sure to remove the bit and check the overall condition of the tool shank and pin groove. The first step in this process is to remove the plug and ring located on the right side of the hammer. Then, remove the bit retaining pin and carefully pull the bit out. Clean all parts carefully then measure the bit and retaining pin diameters to ensure they haven’t hit their wear limits. Coat the bit and pin with grease before putting back into the hammer attachment.
Contact your local John Deere dealer for more information about installing, operating, or maintaining hydraulic hammers.
If you enjoyed this post or want to read others, feel free to connect with us on Facebook, or Twitter!