As soon as spring rounds the corner, many face an array of projects that built up over the cold winter months. In the period between regular snowfall and hot temperatures, home and landowners everywhere are ready to be outside and get their outdoor space looking as good as new. Below are tips for these individuals who can’t wait to work through their list of spring yard cleanup tasks, from repairing gravel driveways to plowing and tilling vegetable gardens.
Preparing Equipment for Spring Yard Cleanup
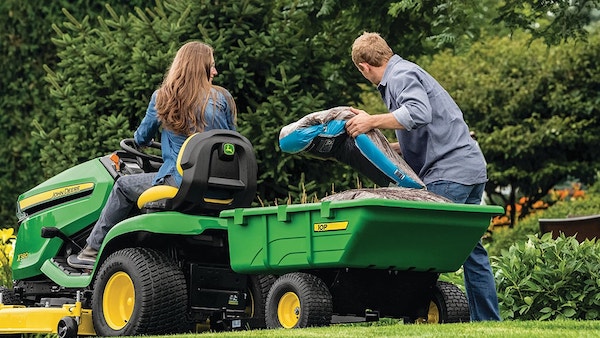
Before jumping into any yard cleanup task, homeowners must first take steps to ensure their equipment is ready to transition out of winter and into spring. Whether they are working with a durable compact tractor or easy-to-maneuver lawn tractor, anybody who is hoping to knock items off their checklist should consider the following.
Tips for Taking a Compact Tractor Out of Storage
The versatility of John Deere compact utility tractors means they’re heavily relied upon by home and landowners that have a laundry list of chores at any given time. From lawn mowing to soil work to material hauling, these pieces of equipment can play an important role in knocking items off one’s spring yard cleanup list. So, after months of sitting in storage due to cold temperatures and less than ideal weather conditions, spring is the perfect time for compact tractors to come out of storage and do what they’re meant to do: Work.
Here are six tips to consider when taking a compact tractor out of storage for the season.
- Lubricate all grease points by attaching a grease gun to the zerk and injecting the oil; this will help keep joints and wear points on the tractor working properly for years to come.
- If a battery maintainer was used to keep the battery alive while in storage, or if battery cables were disconnected, this is now the time to reconnect the battery and make sure it works. Before reattaching the cables, however, clean the posts with battery cleaner. Then, once the cables are attached, jiggle them around a bit to make sure the connections are tight. If the tractor doesn’t turn over and start, refer to the troubleshooting section of the Operator’s Manual for instructions.
- Take the time to change the engine oil, as specified in the Operator’s Manual, especially if this was not a regular practice while the machine was in storage. This should also be the case for the transmission fluid and engine coolant.
- Examine the radiator screen and clean it using an air compressor hose and wand.
- Check the air filter. If it wasn’t changed while in storage, as recommended in the Operator’s Manual, now would be a good time to do so.
- Check the front axle oil and, again, change it as needed, especially if it was not done while the equipment was in storage.
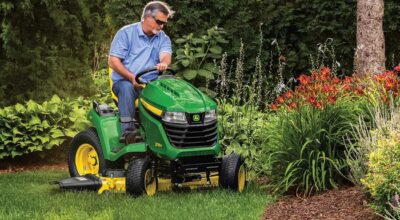
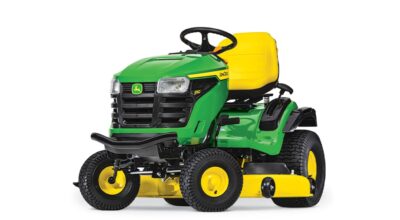
Complete The Lawn Tractor Maintenance Checklist
Spring is the perfect time to dive headfirst into yard work to ensure everything is looking as it should come summer and throughout fall. But before starting any of this work, operators must also prepare their lawn equipment for the seasons ahead. Here are steps to safely get your lawn tractors ready to take on spring yard cleanup with ease.
- Check the Air Filter: Lawn tractor owners may not notice a dirty filter, which can often result in lost power and wasted fuel. If it goes unchanged for a long period of time, a dirty air filter will make it more difficult to start the lawn tractor and could even cause the engine to overheat. With this in mind, checking the air filter should be considered a matter of safety, as well as one of performance.
- Change the Fuel Filter: Fuel filters are like air filters in that they can also cause the tractor to lose power if they are not changed frequently enough. It is recommended that these filters are changed once a year and considering that maintenance will already be the focus in spring, this time of year offers the perfect opportunity to knock another item off the checklist.
- Pay Attention to the Mower Deck: Every spring, the lawn tractor’s mower deck should be removed and reattached. It should also receive proper attention – which could come in the form of a replaced drive belt or blade, or proper mower lubrication – if needed. Taking these steps will not only ensure your lawn can look its best, but also that the lawn tractor can be kept in good condition for years to come.
- Examine Spark Plugs: Dirty or defective spark plugs can cause issues when attempting to start the lawn tractor. It can also make the engine run unevenly or potentially cause misfiring under load, which can be very dangerous for operators if not properly addressed.
Three Easy Steps to Repair a Gravel Driveway
As the snow and ice begin to melt, it is easy to see the damage left behind by winter weather conditions – this is especially true for gravel driveways. And while it can be discouraging to see one’s hard work from the previous year seemingly having gone to waste, there are three easy steps that homeowners can take to repair their gravel driveway come spring.

- Smooth the Driveway: The first step in repairing a gravel driveway is to ensure the surface has been made completely smooth. This can be accomplished with a land plane or box blade, as both these tools break up the surface to a universal depth. If you’re working to repair a pothole in your gravel driveway, grind the surface down to the bottom of the hole, but avoid digging into the foundation. If material the size of your fist is being churned up, you’ve likely dug too far.
- Rework the Surface: Once the driveway is smooth, it’s time to determine the size of gravel that will be used. 1½ ” – 2½” crushed gravel is best suited for a surface that’s occasionally soft and muddy. By using this type of gravel, homeowners can ensure the bottom layer drains and stabilizes the whole surface. It is also recommended to add ¾” gravel on top of the original layer of 1½” – 2 ½” gravel; this layer will include pieces that are as fine as powder and can be packed down to provide stability and firmness on the surface.
- Even Out the New Surface: Once the newly repaired surface is in place, it’s time to fine-tune it. Using a rear blade that’s attached to a tractor and floats along the ground can help leave behind a solid and firm surface.
How to Fill Ruts in a Lawn
For many landowners, winter doesn’t necessarily bring a pause to outdoor tasks. Because of this, these individuals must face the consequences of running their equipment over wet, muddy ground caused by snow, sleet, and icy conditions. By the time spring hits and the ground begins to thaw, landowners that worked outside all winter will need to fill the ruts and tire tracks that appeared as a result in order to avoid running into any productivity barriers along the way.
- Prepare the Equipment: First, attach a rear blade to a utility tractor. Operators can also turn their rear blade into a box blade by using bolt-on endplates that will enable more control while moving soil to backfill ruts and tire tracks.
- Knock Down Ridges: Drive the rear blade over the tire tracks multiple times, both parallel with them and at an angle. This will knock down ridges and move the soil to fill the ruts, thereby helping even out the surfaces.
- Inspect the End Plates: Make sure the end plates are carrying enough soil to fill in the deeper ruts. Additionally, ensure that the rear blade is not digging into the ground too much as it’s moving along.
- Get the Most Out of Your Time: Before beginning the process of filling ruts and tire tracks, take the time to consider things like the wetness of the soil. If there is too much moisture, more tire tracks will only be added to the ones that were meant to be filled in during this process. In other words, ensure the soil is dry enough so that it can be used to eliminate ruts, rather than being in a condition where new ones can be created. Finally, as with any process, be sure to read the Operator’s Manual before using your equipment to ensure you’re abiding by standard safety instructions.
Tips for Tilling a New Vegetable Garden
One of the most exciting, and elemental, things about spring is seeing the outside world starting to come to life once again. As trees begin to bud and flowers begin to bloom, many homeowners rush to get outside and prepare their gardens for the months of sunshine and warm weather that are ahead. For those who are building a vegetable garden for the first time, it is important to follow certain steps to ensure their space will thrive for years to come.
- Mark the Spot That Will Be Tilled: When choosing the right spot to start your vegetable garden, carefully consider factors like sun exposure, drainage, and access to water. Taking these components into account will be vital to helping the garden thrive.
- Mark the First Furrow Straight Down the Middle: After making your first pass with a tractor, turn around and begin the next pass by putting the right rear tire in the furrow that was just created. Continue this pattern to ensure the soil is being thrown into the furrow to the right of the tractor.
- Allow Time for the Soil to Dry Out: After plowing, give the soil time to dry out and settle down, which will be approximately two days in spring. And if you want to get a head start, consider plowing in the fall and allowing the soil to rest throughout the winter to get the best results.
- Make Use of Your Rotary Tiller: It is recommended to use a rotary tiller over the plowed garden soil. If tilling newly-plowed soil, adjust the rear leveling board to its wide-open setting to allow the tilled soil to come out of the back of the tiller freely without causing clogs.
- Continue Tilling: Gardeners working with newly plowed ground should plan to use the rotary tiller two or three more times to get the soil and seedbed just right.
- Finish with Topsoil: Once the previous steps are completed, it is finally time to spread a layer of topsoil and use a rotary tiller to spread it into place.
Take on Spring Yard Cleanup Tasks with Ease
Spring is a time for renewal, but it can also be a busy time for homeowners who want their outdoor space looking as it did before the winter elements hit. From repairing gravel driveways to building vegetable gardens, any task can be taken on with ease so long as the right equipment is involved and certain tips, like the ones provided above, are taken into consideration.
If you have any questions about John Deere lawn care equipment, you can contact your local John Deere dealer.
If you enjoyed this post or want to read others, feel free to connect with us on Facebook, Pinterest, Twitter, or Instagram!